Showing posts with label Cookbook. Show all posts

Sunday

Teddy Bear Cake


I made a Teddy Bear Cake!!! Isn't he just the cutest thing ever? He is so adorable that it was torture trying to cut a slice. I'm really happy with how it tuned out. I love making themed cakes so I was thinking about valentines when this idea popped into my head. Initially I was going to make a heart cake but that's a bit too cliché. So instead I made a cuddly and incredibly yummy teddy bear.


Ingredients:
~525g soft butter
~525g caster sugar
~9 eggs
~2tsp Vanilla Essence
~670g Plain Flour
~2tsp baking powder
~6 tbsp milk

Method:
1. Cream butter. (yeah there is a lot of butter)
2. Add sugar and cream butter and sugar together.
3. Beat in the eggs, one at a time.
4. Add the vanilla essence.
5. Fold in flour.
6. Divide the mixture into 2 sandwich tins, a slightly bigger round cake tin and 6 muffins.
7. Bake the muffins for 20 minutes. Bake the sandwich tins for 30-40 minutes. Bake the cake tin for 40 to 50 minutes. All at 170*C.

Decoration:
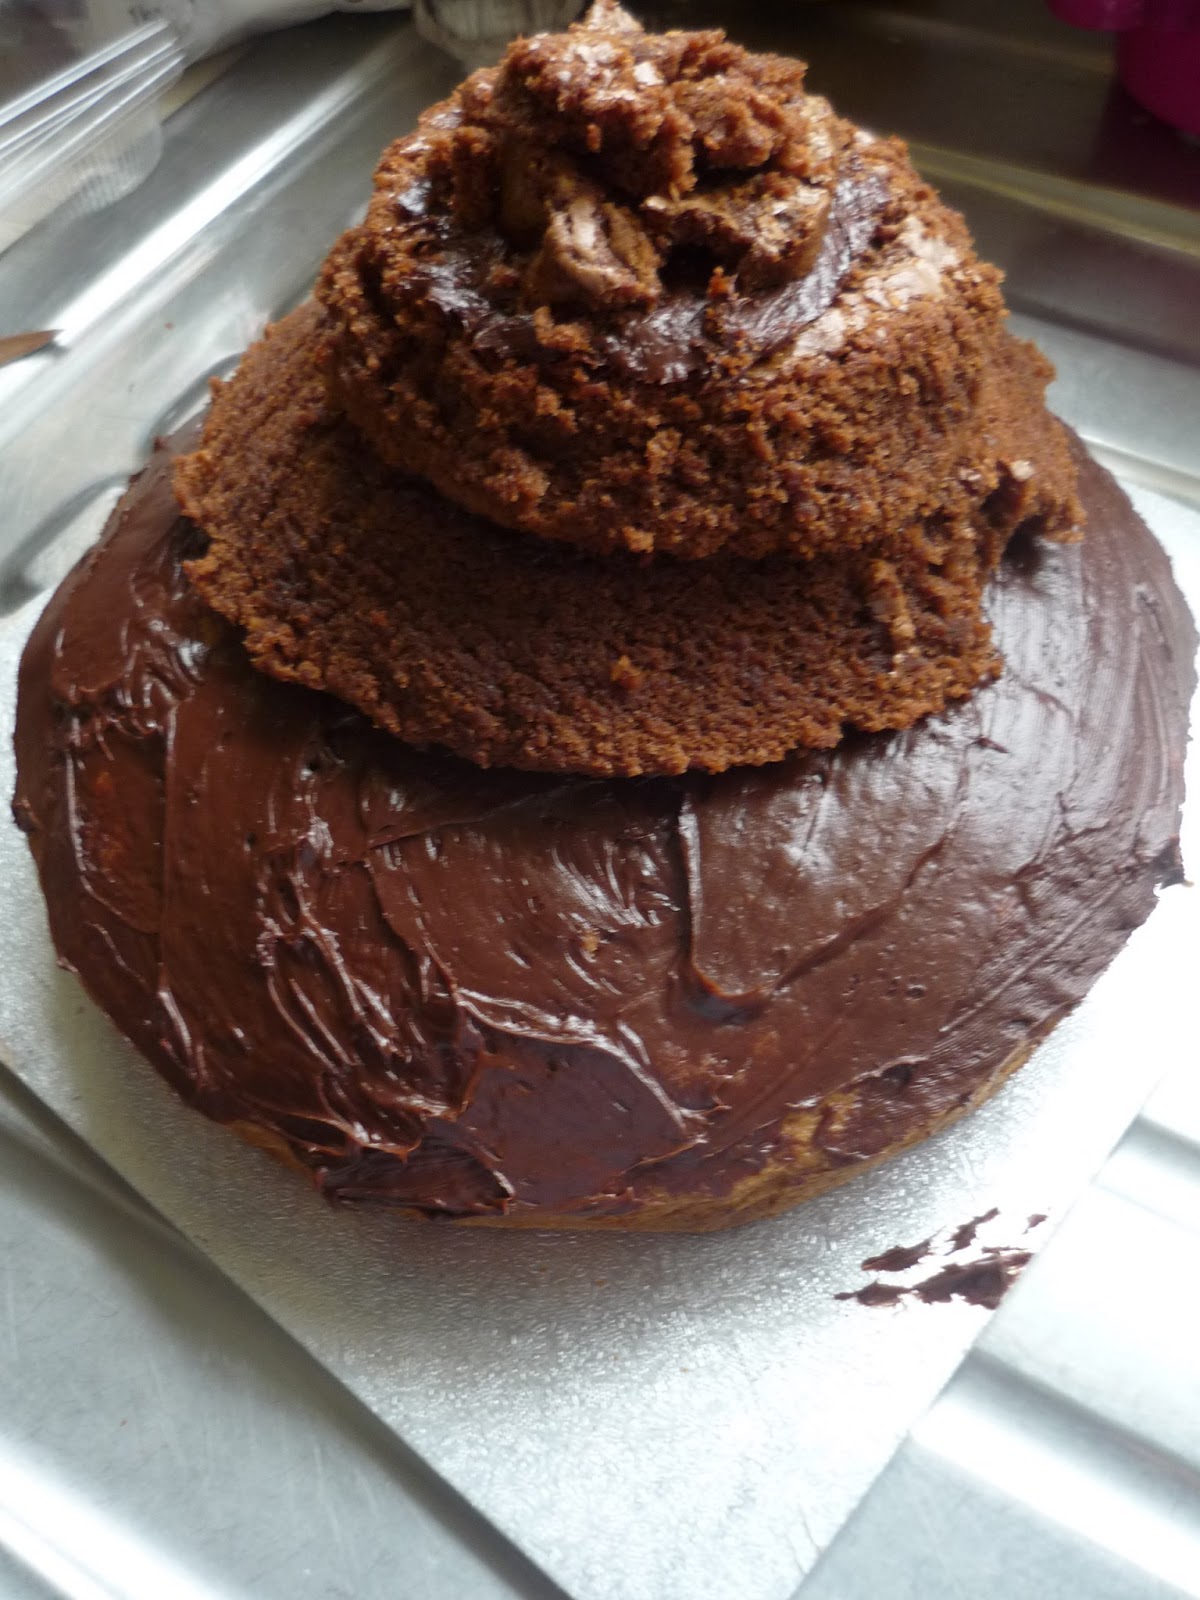
Place all the pieces together as in the picture. I cut off the muffin tops to make them flat. Using a piping bag and some chocolate butter cream I filled in the "hairy" bits. With icing sugar, water and yellow food dye I filled in the tummy, mouth and ears. I used buttons and sugar balls for making his face and paws.


So that's my latest baking craze and destruction of the kitchen (sorry dad!). It was really fun but took ages! What do you think of him?
Happy Valentine's!
Marian ^_^  x

Wednesday

A Christmas Chocolate Cottage Cake


On a wintery cold Saturday afternoon, whilst sitting by the dancing fire, a sudden thought drifted to mind. "I should bake a cake!"
And so it was, I baked a cake. A chocolate cottage cake to be exact.
Now I know that everyone who is anyone knows how to make a chocolate cake, so let me save myself the bother and just show you the pictures I took after.
I used chocolate fudge icing for the roof and a kitkat as the chimney. To give a snowing effect I dusted the cake with icing sugar.. The windows and door turned out a bit clumsy, so I do apologise. Maybe I could make a themed cottage cake for each season....


Happy baking!
And a merry Christmas
Marian x

Sunday

The Classic Christmas Cake

Let's get one thing straight, I don't like Christmas Cake. Never have, never will. It's full of dry fruit and almonds. Neither of which I would eat voluntarily. So you may be asking yourself "Why would I make a Christmas cake then?".
Well,
....I actually haven't the faintest idea.
This isn't the first time I've made a Christmas cake. But it is the same recipe I've always used. According to people who like Christmas cake and have eaten my version, apparently it is "delectable" and "mmm" and "can I have the recipe?" So don't take my family's word for it, try it yourself.
 
Ingredients
350g Currants
350g sultanas
350g raisins
100g mixed peel
100g glace cherries
50g chopped apricots
100g ground almonds
50g grated apple
Grated rind of a lemon
1/2 tsp nutmeg
1/2 tsp cinnamon
1/2 tsp mixed spice
225g butter
225g brown sugar
6 eggs
250g plain flour
5 fl oz whiskey
 
Method
1. Prepare a tin (about 9 in circle) with brown paper (lots of it!)
2. In a large bowl put the dried fruits, nuts, apple, lemon rind and spices. Pour over half the whiskey and cover the bowl with a tea towel, leaving over night.
3. Next day, Cream buter and sugar. Add beaten eggs and then fold in flour. Combine both mixtures (the fruit one with flour).
4. Spoon into tin leaving a little hollow in the centre.
5. Bake in a preheated oven at 140*C for 3 and a half hours. Cover the cake with brown paper for the last 90 minutes.
6. Cool cake in tin for 24 hours.
7. Prod cake with skewer and pour over rest of whiskey. Wrap cake in greaseproof paper until needed or to be iced.
 
Icing
I covered the cake with smooth apricot jam and then put a thin layer of almond icing on.
After that, I rolled out icing and placed that on the cake. Using the leftovers, I dyed some green and made holly to decorate.
As a last touch, I made some red butter cream icing and piped that around the cake. I also stuck a few snowmen on top.


Then you're free to stare at it proudly or shudder at the thought of eating it. ^_^
Happy Christmas!
Marian x

Hedgehog Cake

 
Because of my love for hedgehogs and cake, I made .............. a Hedgehog cake! Very original don't you think? ^_^
I'm really surprised how well it turned out. Usually all my big plans go horribly wrong. Well, I guess this wasn't a very big plan, just a sandwich (tin) size.
So if you want to make this, here's the recipe:
 
Ingredients
For Cake
120g plain flour
125g margarine
125g caster sugar
2 large eggs
1 tspn of baking powder
1tspn vanilla essence
 
For icing
25g Bournville Cocoa (or any other dark choc cocoa)
60ml Boiling water
175g butter
300g icing sugar
 
to decorate
3 packs of Chocolate buttons
1 pack of White Chocolate buttons
Or maybe some smarties
it's up to you - go crazy
 
Method
1. Preheat oven to 180* C (350*F). Line two sandwich tins.
2. Cream sugar and margerine of cake mix together.
3. Add eggs and vanilla essence and combine.
4. Sift in flour and raising agent.
5. Spread equally between tins and bake for 30 minutes.
 
6. When the cake has cooled make icing.
7. Dissolve cocoa in the boiling water to make a paste. Let cool.
8. Cream butter and icing sugar together until light.
9. Combine the butter mix and chocolate paste.
10.  Sandwich the two cake layers together with a little icing and carve shape of hedgehog (like an egg cut vertically)
11. Pipe the icing over the cake from the back to the nose (pointy bit) and smoothen the face.
12. Stick buttons in icing to resemble bristles.
13. Make the nose and eyes with white buttons or smarties.
14. Boast to everyone about you mad baking skills.
 
Enjoy!
Marian x


The Night Circus ........ CAKE

I have created a cake inspired by the book the Night Circus. So whadya think?
I admit it does not look very professional but I think the taste makes up for that. It is supposed to be the circus tent with black and white stripes but the black turned out a little bit greyish. I blame my mediocre equipment. I don't even have an electric whisk (I had to hand cream the butter and sugar together - my arms are aching!)
 
For the Base ~ vanilla cake
you will need:
- 220g butter
220g caster sugar
4 eggs
tsp vanilla extract
280g plain flour + raising agent
 
Method
1. Cream butter and sugar.
2.Add eggs, one by one.
3 Add vanilla.
4. Fold in flour.
5. Bake in an oven at 160*C for approx. 45 mins, until skewer come out clean. (tin~ circular cake/ cheesecake tin)
 
For the tent part ~ chocolate cake
you will need
150g dark chocolate
125g butter
150g caster sugar
3 eggs
55g plain flour
 
Method
1. Melt butter and chocolate together
2. Add in the sugar
3. Stir in beaten eggs
4. Fold in flour.
5. Bake in 165*C oven for approx. 40 mins. (tin ~ 2 sandwich tins)
 
Putting it all together
Cover base with chocolate fudge icing (as above) and somehow cut the chocolate cake into a tent shape and plonk it on top of the chocolate covered vanilla cake. You can put more fudge icing between  the tent layers.
Cover cake with white roll out icing strips. Make sure to get them to the top of the tent, leaving a gap in between each one. Fill in the gap with black roll out icing. Make a flag, if you wish and prop it on top. With red icing write The Night Circus. And viola!


Happy Baking!
x 


Easter Eggs and Chocolate Cake

At long last it is the Easter Holidays. I've been counting down the days to this glorious break but now that I actually have my Easter Holidays, I'm bored out of my mind. So naturally, I dug out the bowl and wooden spoon to do a spot of baking. I can't even remember the last time I opened a cook book or lined a tin, I've been so busy with school. And I must apologise for boring posts that probably sound like a whining teenager but nevertheless I am back and ready to delve into your lovely blogs for the next two weeks, provided I do not have a life.
Now for the cake, it is a two-layer brownie with double cream and crushed oreos in the centre and a dollop of fudge icing in top along with what is supposed to look like a nest of eggs.
Ingredients
150g Dark Chocolate
50g Milk Chocolate
80g Butter
200g Caster Sugar
110g Plain Flour
3 eggs


Method
1)  Heat oven to 180*C and line two sandwich tins.
2)  Melt dark and milk chocolate whilst adding the chopped butter.
3)  In a beaker combine 3 eggs with a tspn of vanilla extract and then add to the cooled melted chocolate and butter.
4)  Add flour and sugar and mix.
5)  Bake in prepared tins for 20 minutes.


When the cake is cooked and cooled, whip some double cream and mix in 3 crushed oreos. Spread on one layer of cake.
And finally coat the cake with chocolate fudge icing and decorate with mini eggs.

Viola; an Easter cake with chocolate goooodiness!
 
Enjoy thees chocolate-coated-two-weeks-free-from-school
x

Tuesday

Pancake Tuesday

I was up at the crack of dawn this morning to make my batter (more like 8:30).
After leaving it in the fridge for an hour or so, I made my first pancake of the day and I really think it's the perfect pancake in the world. Like, seriously! It should be in the Guinness book of records or something!!
 
Ingredients
125g plain flour
1 egg
1/2 pint of milk
pinch of salt
 
Method
1. Make a hollow in the flour and put the egg in. Add a little milk and mix together.
2. Add the rest of the milk and combine it all together. Add salt.
3. Place in fridge for at least an hour to let the starch absorb liquid and swell.
4. For cooking, heat a little oil in a frying pan.
5. Pour in desired amount of batter and cook on either side for approx. 2 minutes.
6. Use a spatula to keep pushing the sides in to stop from sticking.
7. Serve with whatever you like and eat!
 
 
I also changed the about me page. I'm not sure if anyone really reads it but it's there if you have no idea who I am. This time I decided to actually write about my self instead of going "I am: Marian, girl, 16, likes reading...."
Tell me what you think if you bother to read it. There might be a few spelling/comma mistakes because the check speller isn't working. Sorry!
 
Have a very happy PANCAKE TUESDAY!
x


Monday

Chocolate Cheesecake Brownies

A mixture of vanilla baked cheesecake and chocolate brownie. Yummy!
If your in the mood for some baking during this midterm, why not bake this. Even if you don't like cheesecake you can give it to a neighbour or friend (Karma will love it).

Ingredients
~For Cheesecake
  1 egg
  225g cream cheese
  50g caster sugar
  5ml vanilla essence

~For Brownie
  115g dark chocolate
  115g unsalted butter
  150g light brown sugar
  2 eggs (beaten)
  50g plain flour

Method
1. Preheat oven to  160*C. Line tin.
2. Start with cheesecake mixture, by beating egg in a bowl. Add in cream cheese, caster sugar and vanilla essence. Beat until smooth and creamy.
3. In a different bowl make brownie mixture. Melt chocolate and butter, stirring well. Add in sugar.
4. Add the eggs, a little at a time, and beat well. Gently stir in the flour.
5. Spread 2/3 of the brownie mixture into the tin. Pour all of the cheesecake on top. Spoon on remaining brownie mixture in heaps. Use a skewer to create a marbled effect.
6. Bake for 30-35 minutes. Leave in tin to cool, then cut into squares.

Happy Baking
x


Saturday

Fortune Cookies

In the spirit of the Chinese New Year and also because it was my cousin's birthday, I made Fortune Cookies!

All you need is:
3 egg whites
50g icing sugar
40g butter (melted)
50g plain flour

Method
1.Preheat oven to 200*C. Line a tray with parchment paper and grease that too.
2.lightly whisk egg whites and icing sugar.
3. Add melted butter and flour and beat until smooth.
4. Use a desert spoon to drop the mixture onto tray in circles. Only put about 5 circles of the mixture on the tray at any time. Make sure the parchment paper has been greased so when the time comes you won't scream at the them for sticking.
5. Bake for 6 minutes, until golden.
6. Place a message on the circles and fold over. Fold again and rest it on the rim of a cup/glass.
7. Keep repeating step 4-6 until you run out of mixture.

And seeing as it was my eldest cousin's 30th birthday, I pounced on the opportunity to give her some ... amusing fortunes... ^_^

I think its funny that your birthday coincides with a global economic depression.

I enjoy giving you a birthday card because you are and always will be older than me.

Birthdays are good for you.  Statistics show that the people who have the most live the longest.

The secret to staying young is to live honestly, eat slowly and lie about your age.
 
Happy Birthday Julie!
x

Sunday

The Adorkable Brownies

I apologise for the lack of posts and their quality but I have an excuse. I'm back to school!
I was originally going to give a study guide along with tips but seeing as I am no good at studying my advice would not be helpful. I'll leave that post to Nicola
Don't they look yummy.
(not my picture)
(I know it doesn't matter if I used a disclaimed note or not if I get sued.. but hopefully I won't end up in court at the tender age of 16.) 
 
So now I've changed this post into a recipe.
IIf anyone remembers "my sister's birthday post", you would have seen a picture of the brownies I made and a note telling you recipe coming soon.
Well here it is.
 
I found this recipe at The Adorkable Blog. The author, Sarra Manning, wrote a book "Adorkable"  where the main character owns a blog. And that link is to it. It's from the perspective of Jeanne Smith but actually written by Sarra Manning.


200g dark chocolate (70% cocoa solids)
80g unsalted butter, room temperature
200g caster sugar
110g plain flour
1 teaspoon vanilla extract
1 pinch salt
I level teaspoon of baking powder
3 eggs
50g roughly chopped milk chocolate
50g roughly chopped white chocolate
Table spoon of milk

I'm getting tired of typing now so if you want the recipe click here!
I dork, therefore I am
x

Monday

Happy Birthday lil' Sis!

Recently, it was my lil' sister's Birthday and I was asked to make her a cake. After hours of struggling to decide on chocolate or vanilla (she's very picky) she finally says she wants a cookie cake!
Being the wonderful sister that I am, I made her a "cookie cake".
Basically it was just a giant cookie!

And just in case this failed I made a backup:
Adorkable Brownies!
 
(recipe coming soon to a blog near you)


And finally onto the card I made for her:
1. Colour a pattern on half a card.
2. On a separate colour card create another pattern.
3.And now onto one of my favourite scrapbooking techniques, stitching!
All this is, is drawing little lines one after the other.
Here: I put it on a green strip of paper to link both sides.
 
4. Add a little decor with a tag and ribbon
 
Fin!
x


Tuesday

It's the 31st of July and that means...

If you haven't noticed already today is the 31st July. And that, my fellow bloggers, is a very important date! If someone has really no idea what I'm talking about, shame on you! No it's not the last day of summer.... well technically it is but that's not what I'm talking about.
Today is the birthday of the one and only ....


...Drum roll please...


.....


HARRY POTTER!!!

He also share's it with his author/creator J.K Rowling. So, I say to them:
Happy Birthday!
Also in honour of their birthday I have made Harry Potter themed cupcakes

Yum!
I made... gryffindor tie, candle cupcake, HP letters, lightning scar, random icing, snitch, HP letters, gryffindor scarf, wand, broom, deathly hallows sign, random icing!

On another note, I want to share with you two things I bought whilst on holidays.
First of all, I love Disney and when I saw this I just had to buy it!
Pinocchio!
He is awesome.
I still haven't mastered the art of strings but I can make him sit and stand!
The other item is....
I absolutely adore elephants!
Happy Birthday Harry!
x


Oreo stuffed chocolate chip cookies

If you havn't realised this already, I love oreos. Especially dipped in milk yum! I also love using them in cooking. I've alrady made an oreo cheese cake, you can find that HERE!
Now I have found the most incredible recipe: cookies with oreos in them!


If you want the recipe click here
til next post!
x

Wednesday

Chocolate Orange Muffins/ Brownies

So yesterday Emily gave me this incredible idea... Chocolate Orange Muffins!
I adore chocolate and my favourite bars happens to be orange flavour. So I was like why I hadn't I thought of this earlier! Thanks Emily. Check out her blog HERE!

Ingredients
180g butter                                                               
180g mixture of dark and milk chocolate          
3 eggs                                                                 
250g caster sugar                                               
110g plain flour                                                 
2 Orange rinds and a squeeze of juice

For icing
75g butter
225g icing sugar
3 dessertspoons milk
1 orange rind
Method
1. Melt chocolate and butter.
2. Add sugar
3. Let cool before adding eggs.
4. Add flour, I like to add a little bit of raising agent as well.
5. Add orange rind and a squeeze of juice from half an orange
6. Bake in a preheated oven at 180*C for approximately 20 => 30 minutes or until skewer comes out clean.

Make butter cream icing and decorate on the cooled muffins.
Since I had mixture left over, I also made a few brownies.

Today is also the 4th of July!!
Even though I am not American nor have I ever been there (yet) here is a picture I googled:
Happy 4th of July!
x

Tuesday

Back to the Basic Cupcake

I've tried many recipes for cupcakes, muffins, queen cakes, fairy cakes or what ever you choose to call them. They've all been standard and plain but this one I found recently is really delicious.
It's really important to have a correct recipe for basic cupcakes as it is the first step to creating and decorating the most spectacular creations. How would we have been able to make these wonderful tasty treats without this recipe?
(here's a few pictures I googled)


Ingrediants
110g butter
110g Castor sugar
2 eggs
1/4 teaspoon vanilla extract
140g plain flour
1/4 teaspoon baking powder (raising agent)

Method
1. preheat oven 170*C
2. In a bowl, cream the butter.
3. Add sugar and cream together.
4. Add the eggs, one by one, beating all the time.
5. Add vanilla extract.
6. Fold in sieved flour and baking powder.
Bake the mixture in a prepared muffin tin or paper cases for 10 minutes!

Here is one form of cupcake I made with this mixture: Jam and cream butterfly buns
Happy Baking!
x


Friday

Rainbow Cake

So recently I've been seeing a lot of rainbow cakes all over pinterest and we heart it. They look so awesome I just had to try it. I used a basic maderia mixture and just added approximatly a teaspoon of food colouring to each bowl Most of the pictures I'd seen have at least 6 layers but I only used 4 and that was plenty. Between each layer I used butter cream.
 I wasn't sure what to write on top as there was no occasion for it. So I just wrote "Summer"
It was well worth making it
x

Wednesday

my PIANO CAKE

My birthday was a while back and for it I decided to treat myself by baking a PIANO CAKE!! If you do not know why this seems so thrilling to me it is because I adore my Piano. I just love it so much. My Piano is one of my favourite things.
Here is my drawing as I prepared to transform it into a chocolate cake:
... and then this is what it turned out like
I used a square tin and cut out the shape from there. It tasted delish.
...mmmm...
yummy!
In the near future I think I'll attempt another Piano cake but it will look a lot more professional than this one.
bye
x

Tuesday

Lemon Squares

My latest craze has been lemon cake. I just can't stop eating it!I love the creamy icing with white chocolate and that sudden lemon flavour. I attempted making my own version of lemon cake but unfortunately I overused the lemon with all my excitement and got a really bitter taste. :(
At least it doesn't look so bad!
x